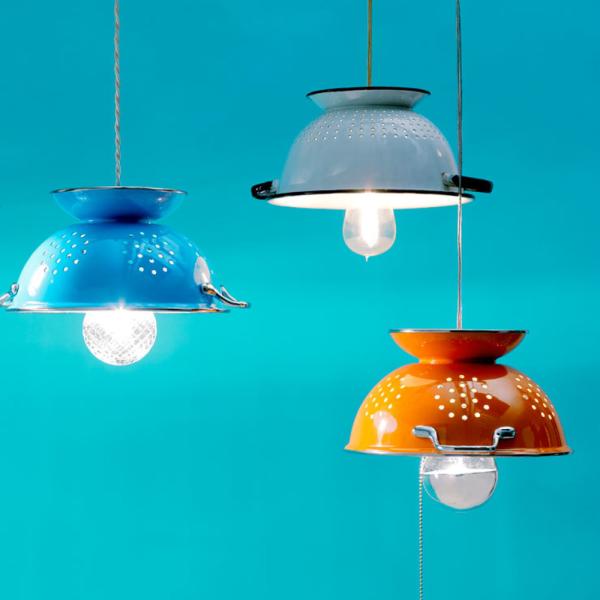
One of the main reasons why people choose to take out their hand tools and make a DIY is genuinely because they turn out to be a genius and useful idea. A colander can have many more uses aside from just straining your pasta or washing your lettuce. If you have several kitchen strainers lying around and getting all dusty, know that you can put them into a much better use by turning them into sophisticated pendant lamps. It is a simple yet highly alluring idea that will look beautiful when the light shines through all those tiny holes.
In this OneHowTo article we explain step-by-step how to make a colander lamp.
- Old colander
- Hanging lamp cord
- Lightbulb
- Plastic cover-up (optional)
- Power drill
- Paint (optional)
The first step is to gather all your supplies. You will need an old colander (or one that you like from a store), a hanging lamp cord and a light bulb. Additionally, you will need a power drill, a cover-up for the cabling and paint.
Perhaps the most important element of this DIY is the colander. You may choose to stick with a metallic colander or use paint to change the color of your colander to match your room’s decorations. For instance, if your kitchen follows a vintage style you may paint it in enamel white color.

Once you have your colander ready, check the lighting fixture in the room. This DIY looks best with a hanging lamp cord. You can buy one at any lighting store and drill it to your ceiling. This is a good time to buy a bulb if you don’t have one already and a cover-up if the cables are highly visible.
The next step requires some precision. With your colander placed upside down trace a small circle, you will have to drill around the circle to create a hole. You must be able to put the lamp cord through the hole and then insert the light bulb on the other side. The circle must be smaller than the lamp cord end.

Before you insert the light bulb, make sure that the lights are turned off and always make sure that you are working safely. Then, you may place the cover-up around the top of your colander to hide the cabling.
If you don’t have your lamp cord attached to the ceiling, you may have to contact an electrician to connect the wires to your house electricity system. Decide how far down you want it to hang to best lighten up the room. If placed in the center of the room, you may want it higher up to reach farther away. Differently, lamps hanging above tables may look best by hanging really low allowing the light to shine down directly.

Once you are finished, turn on the light and admire how beautifully your new lamp looks. If you like the idea we suggest you create outdoor hanging lanterns next. Remember that since colanders are usually made from stainless steel they will heat up and may burn your skin if you touch it. For cleaning or removing purposes make sure that the colander has had some time to cool down first.
If you want to read similar articles to How to Make a Colander Lamp, we recommend you visit our Interior Design and Decor category.